Entering Alberta Immunization Information - Alberta Only
As of January 1, 2021, Alberta pharmacies are required, by law, to report immunization events for publicly funded and non-publicly funded immunizations to the provincial immunization repository (Imm/ARI).
PharmaClik Rx will not be integrated with Imm/ARI by January 1, 2021, as PTS is diligently work on a new software version to be released in 2021. Pharmacies should use the Immunization Direct Submission Mechanism (IDSM) to electronically submit immunization events to Imm/ARI. Once submitted, a PDF with the information and a batch ID is generated and should be linked to the patient's Profile in PharmaClik Rx for proper documentation.
Note: Effective January 1, 2021, failure to record immunization information can result in fines to your pharmacy. It is important that your pharmacy records this information when required.
It is your pharmacy's responsibility to record any Adverse Event Following Immunization (AEFIs).
Registering for Access to IDSM
To register for access to IDSM, see the Alberta Netcare Learning Centre for more information.
Note: It can take up to 2 weeks to get approval from Alberta Netcare for access to IDSM.
Entering Immunization Information into IDSM
Once you've been approved for access to IDSM, immunization information can be entered. To learn how to enter immunization information into IDSM, see the Immunization Direct Submission Mechanism (IDSM) User Training Materials provided by Alberta Netcare.
Saving a Immunization Record PDF
Once information is entered into IDSM, a PDF can be generated with information about the submission and the batch ID. It is recommend that the PDF is saved to a central location, such as a folder on the SVR, for easy access in case Alberta Netcare has questions or needs to reference a specific batch idea.
To save an Immunization Record:
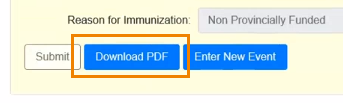
- Once the immunization record submission on Alberta Netcare is completed, select Download in IDSM.
- Save the PDF to a central location, such as the Support folder on the SVR.
- We recommend creating a new Immunization Record folder under the Support Folder on the SVR and saving all PDFs in this location. The Support folder can be accessed from the following filepath: \\SVR1\C_drive\Program Files\Propharm\Nexxsys\Support.
- The Support folder is automatically backed up by PTS and any folders or files in this folder will also be backed up. This ensures that in the event these files are misplaced, they can be recovered.
- This folder can be accessed by any of the workstations to save a PDF or to retrieve a PDF to attach to a Patient Folder by following the filepath above.
Tip: Instead of manually navigating to the folder each time you need to save or retrieve a PDF, create a Map Network Drive. Once created, a Map Network Drive will automatically navigate you to the folder in one click. For more information, see How can I easily navigate to folders on a workstation or the SVR?
Attaching Information to a Patient Profile in PharmaClik Rx
The PDF that is generated once immunization information is entered into IDSM should be attached to the Patient Profile for easy access and future reference.
There are two parts that need to be completed to save the PDF as an attachment to the Patient Profile.
Part 1: Creating a new attachment type for the Patient Profile
Part 2: Attaching the PDF to the Patient Profile
Part 1: Creating a new attachment type for the Patient Profile
Creating a new attachment type only needs to be completed once. If this has already been done at your pharmacy, proceed to Part 2: Attaching the PDF to the Patient Profile.
To create a new attachment type:
- Select More > List Maint. The List Maintenance window appears.
- Search for or select from the dropdown Attachments - Patient.
- Select Add. A new line appears.
- In the Description field, enter Immunization Record.
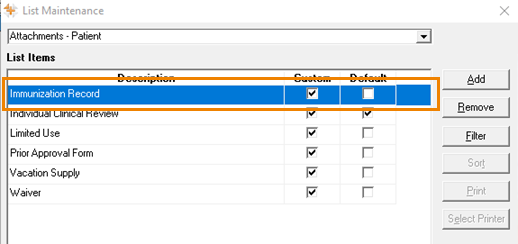
- Select OK. The List Maintenance window closes.
- Proceed to Part 2: Attaching the PDF to the Patient Profile.
Part 2: Attaching the PDF to the Patient Profile
To attach the PDF to the Patient Profile:
- Download and save the PDF from IDSM. For more information, see Saving a Immunization Record PDF.
- Navigate to PharmaClik Rx.
- Search for and select the patient.
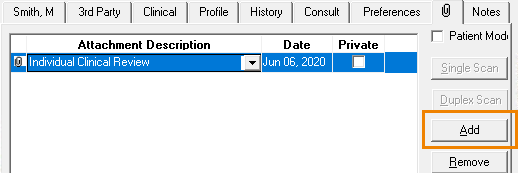
- Select the Attachments tab.
- Select Add.
The Select Attachment window appears. - Browse your computer and locate the PDF that was downloaded and saved in step 1.
- Select Open. The Select Attachment window closes to the Attachments tab with a new line generated.
- From the Attachment Description dropdown, select Immunization Record.
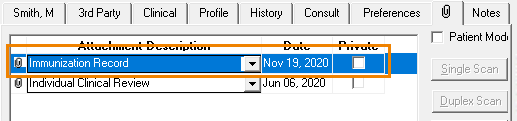
- Select Save.
Helpful Links
Alberta Netcare Learning Centre
Immunization Direct Submission Mechanism (IDSM) User Training Materials