Configuring PharmaClik Rx for Scanning
To configure PharmaClik Rx for scanning:
-
Select More > Pharmacy.
-
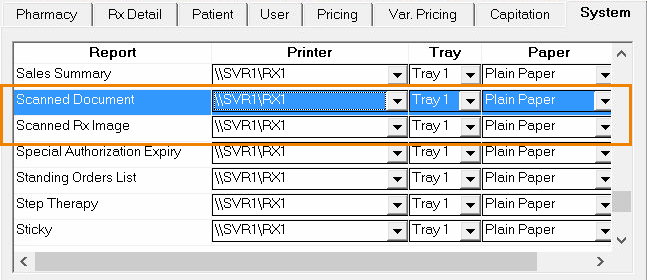
Select the System tab.
-
In the upper half of the tab, scroll down until Scanned Document and Scanned Rx Image are displayed in the Report column.
-
Select a printer from the Printer dropdown list for the Scanned Document and Scanned Rx Image rows.
-
If required, select a printer Tray (the default is Tray 1).
-
Select Scanner Installed, located at the bottom of the tab.
-
Choose the scanner from the dropdown list.
The Scanner Installed checkbox and dropdown list are disabled when a scanner is not present on the network.

-
Select Save.